Twine Service Deployment
Twine AWS Requirements
- IAM User
- Route 53
- DynamoDB
- Secrets Manager
- Elastic Beanstalk
- Certificate Manager
- ElastiCache for Redis
- Application Load Balancer
The Twine architecture is extensive and requires broad permissions. For smooth deployment, we recommend creating a new AWS account and ensuring that Node.js v18.x or greater is installed in your local environment. Complete the steps below to deploy Twine.
Create an AWS Account and IAM User
Step-by-step guide
- Sign up for a new AWS Account
- Sign in to your new AWS Account
- Click the second rightmost button in the top navbar
- Select the region where you will deploy Twine
- Type 'IAM' in the search bar at the top of the page
- Click on the 'IAM' service
- Click 'Users' in the sidebar
- Click 'Create User'
- Choose a user name and click 'Next'
- Select 'Attach Policies Directly'
- Type 'AdministratorAccess' in the 'Permissions Policies' searchbar
- Select 'AdministratorAccess' and click 'Next'
- Click 'Create User'
- Click 'Users' in the sidebar and select the user you created
- Click the 'Security Credentials' tab
- Click 'Create Access Key'
- Select 'Command Line Interface (CLI)'
- Click 'Next' and then click 'Create Access Key'
- Prepare to provide your access key and secret access key
Create an AWS CLI profile
Step-by-step guide
- Install the AWS CLI
- Execute
aws configure --profile new-profile-namein terminal, replacingnew-profile-namewith your desired profile name - Provide your access key and secret access key
- Provide the region that you previously determined (must match)
Register a Route 53 Domain
Step-by-step guide
- Enter the AWS Console and search for 'Route 53'
- Click 'Dashboard' in the Route 53 page sidebar
- Check the top right of the webpage and ensure you are in the previously determined region
- Register a Route 53 domain (you will later use the domain name with the Twine client library)
Request a TLS Certificate
Step-by-step guide
- Search for 'Certificate Manager'
- Click 'Request Certificate' in the Certificate Manager sidebar
- 'Request a Public Certificate' should be selected; click 'Next'
- Enter your new domain name
- Select
email validation& follow instructions in the email - Select the 'RSA 2048' key algorithm
- Click 'Request'
- Validate the request
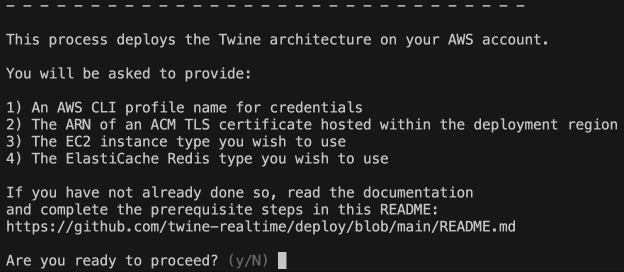
Deploy the Twine Architecture
Step-by-step guide
- Clone this repository
- Open your terminal
- Navigate to the repository directory
- Execute
aws configure list - If the 'Name' value is not your newly-created AWS CLI profile name, execute
export AWS_PROFILE=new-profile-name(this command is different for Windows users) - Execute
aws configure listagain to confirm the change occurred - Execute
npm installto install the Twine deployment dependencies - Execute
npm startto launch the deployment process - Follow the instructions in your terminal
The creation process can be observed in the 'Stacks' section of the AWS Cloud Formation page. After the process is complete, the Twine server will be running in the Elastic Beanstalk environment. However, to satisfy browser requirements, Twine must use your newly-created domain name instead of the load balancer endpoint.
Create a DNS Record
Step-by-step guide
- Enter the AWS Console and search for 'Route 53'
- Click 'Hosted Zones' in the AWS Route 53 sidebar
- Click on the listed domain name
- Click 'Create Record'
- Ensure the Record Type is 'A' then click 'Alias'
- Set the 'Endpoint' to 'Alias to Application and Classic Load Balancer'
- Select the region name that you previously determined
- Select the single option for 'Choose Load Balancer'
- Click 'Create Records'
Record creation will take a few minutes. The Twine architecture will then be complete and ready for the Twine server/client library implementation. Please note that Twine issues third-party cookies for sticky sessions and to store WebSocket session data for connection state recovery. Your Twine API key (required to publish to the Twine API) is available on your newly-created AWS Secrets Manager page.